Tutorials

Showing posts with label rhymes. Show all posts

Sunday, March 17, 2013

Little fox...


Once upon a time there were three little foxes
Who didn’t wear stockings, and they didn’t wear sockses,
But they all had handkerchiefs to blow their noses,
And they kept their handkerchiefs in cardboard boxes.

And they lived in forest in three little houses,
And they didn’t wear coats, and they didn’t wear trousies.
They ran through the woods on their little bare tootsies,
And they played “Touch Last” with a family of mouses.

They didn’t go shopping in the High Street shopses,
But caught what they wanted in the woods and copses.
They all went fishing, and they caught three wormses,
They went out hunting, and they caught three wopses.

They went to a Fair, and they all won prizes –
Tree plum-puddingses and three mince-pieses.
They rode on elephants and swang on swingses,
And hit three coconuts at coconut shieses.

That’s all I know of three little foxes
Who kept their handkerchiefs in three little boxes.
They lived in the forest in three little houses,
But they didn’t wear coats and they didn’t wear trousies,
And they didn’t wear stockings and they didn’t wear sockses.

A. A. Milne
 

I've been knitting again. This time for Mrs Bloom who lives in a place where she really doesn't need such things but well.... it is cute, yes?

The pattern is the mini fox stole from the highly talented and whimsical Tiny Owl Knits

Wednesday, July 27, 2011

Craft group ~ to the ladybird ~ a tutorial

Oh! Ladybird, Ladybird, why dost thou roam
So far from thy comrades, so distant from home?
Why dost thou, who canst revel all day in the air,
Who the sweets of the grove and the garden, canst share;
In a fold of a leaf, who canst form thee a bower,
And a palace enjoy in the tube of a flower;
Ah, why, simple Ladybird, why doust thou venture,
The dwellings of man so familiar to enter?

by Charlotte Smith cira 1807


They are a bit cute.. I wanted to make an orange one too but got a bit distracted finishing off making next week's project (always one step ahead!)

Just before I leap into the tutorial I wanted to show you how my pirate from last week turned out; I think he is fabulous (especially his wee hook!) I have my head swimming with ideas to improve him so consider this a prototype!


Right ladybirds ~
You will need the pattern template from here, scraps of red (orange, yellow), green and black felt, embroidery floss (work with two strands), wood roving for stuffing and I think that is it. (Oh you might like to use little black buttons or beads for the wing spots).


Cut out your pieces (remember the sparkle pen tip for tracing onto black felt).
Sew felt spots, black beads, buttons or french knots onto the wings first.
Then paying attention to your As, Bs and Cs, stitch the wings to the side of the head section. Then stitch the funny little V bit which will curve the head nicely.


Ok, now using red thread (or other coordinating colour) stitch the wings together down the centre back.


Now find the centre of your base and match it with the centre wing seam. Starting with the curved head end begin stitching the top and base together. The base will seem too small, don't panic, you need to ease your stitching to make the top fit the base so that you get a nicely domed ladybird.

Leave a bit of a gap before you close the stitching and stuff it firmly but not so it is bursting at the seams.


Close it up; leave your needle threaded and attached. To make antenna, bring your needle and thread out in an antennerish spot on its head and make a small back stitch/knot flush with the spot. then bring the thread directly up to what looks like a good length and tie a knot in the thread before snipping the thread with scissors just above the knot. Go in again on the opposite side and do it all again.


You can stitch your finished ladybird to a little leaf (add a clasp to the back and it is a brooch, pop it on some black elactic and it is a sweet little headband, or just sit it on the bench and let little hands play with it).


Wednesday, June 1, 2011

Wednesday Craft Group ... Everyone needs a little friend

Hmm... well I know they look a little like voodoo dolls now BUT if I work like a crazy woman tonight I should get them finished in time to give one to each of my big girl's friends as a party gift.

These sweet little dolls were dreamed up by the crafty women over at a Time 4 Craft  at Toadstool House and are called Affirmation Pocket Friends "these wee folk are created with someone special in mind that needs a litle friemd in their heart and pocket to remind them to draw on their own magical inner strength when they need it".

I asked each of their mothers what their daughter's favourite colour was and what an appropriate affirmation would be; so each is personalised for the child.

I will write out a verse similar to this one for each:

I have a little pocket friend
Whom when hold their hand
and tell myself that I
BELIEVE
I truly know I can.

Well must dash. I have to read to my big girl before planting nine kisses on her head. Make two more wee folk and finish the three voodoo ones before sneaking back into my big girls room to thrown her birthday quilt over her sweet sleeping self.

Thursday, February 3, 2011

Our Little Earth Playgroup


 I tried to teach my child with books
he gave me only puzzled looks,
I tried to teach my child with words,
they passed him often unheard.
Despairingly I turned aside,
"How shall I teach this child?" I cried
into my hands he put the key.
"Come", he said, "play with me!" 
Anonymous                                                          
                                             

Remember this post about a beautiful book written and illustrated by mothers from my big girl's school? Well I have been waiting about a year for a space to become free for me and my wee girl to join their morning circle. Today was our first day ~

Oh is was so beautiful, so worth the wait.  I wish I could show you in photographs but words will have to surfice for now.

We began the morning with free play...because my wee one had not been before she explored the sandpit and the hammock swing, the tree trunks and the long grass. When everyone had arrived we gathered into a small circle for morning verse and a couple of simple songs; it was ok if some children were too distracted and wandered off, or shy and clung to their mothers or simply sat and watched. Afterwards each child was given a handful of freshly cut grass and we wandered down the hill to a fence at the edge of Vicki's property. A couple of stunning chestnut mares meandered across stooping low to nuzzle the grass from the chubby hands of our babes. My wee girl was delighted and hunted for more grass.

I know that Vicky's group has been running for years and the rhythm is always the same, so the horses know the children are coming and the children were quiet, patiently wait their turn.

After the grass was gone we wandered through the bush to the dam to see if their were any ducks about. None their today, so our walk continued up the gentle slope toward the house.

The outside area was set up so beautifully. A long low table with sanded logs cut to stool size for the wee ones, a wash bowl and little towel for their hands. Another shaded sandpit, a home corner, a rug with baskets of shells and seed pods, simple percussion instruments and an assortment of other simple toys.

Together we cut fresh fruit to share, and made some very simple raw almond meal and tahini balls (I will share the recipe another day) some children went with Vicki to feed the wild native birds and collect herbs from her garden to make tea, others helped prepare morning tea and others played.

We sat togther and sang ~
Blessings on the blossoms,
Blessings on the fruit,
blessings on the leaves and stems,
blessings on the root.

The fresh herb tea was divine - mint, lemon grass and yarrow - I am going to plant yarrow on the weekend; it was so fresh and cooling (it was a horribly hot humid day; 32 degrees C at 10am).

After morning tea the children played; in the sand, in tubs of water, with each other and alongside ~ it was so relaxing to just watch them, have another biscuit and another cup of tea and talk to other women! I loved it!

Playtime wrapped up as easily as it began. Vicki gathered the seven children together and told a story with a simple silk puppet and song. She slipped the puppet into a basket and announced it was time to feed the chickens...I LOVE chickens as does my wee girl.

The morning ended with a walk through the trees, stopping to admire and climb the lychee tree before heading back to where we began in a circle to say goodbye.

My wee girl fell asleep on the drive home.
This will be our new Thursday morning rhythm, I'll bring you more adventures next week.

Tuesday, November 2, 2010

My contribution to the 'Artful Stone Swap'

In the middle of last month GardenMama declared an artful stone swap it was/is to celebrate beauty, creativity and light. The swap was open to everyone, and although I would love, love, love to be able to crochet a cover for a stone like these ones, alas I cannot.

Felting and I are, well...I can do it but I lack the will... painting is not me either; I like to I just don't think I am particularly artful at it... stamp - nope, draw on..umm see painting, create a mosaic - sounds stunning but I'm thinking large scale not postable, and collage I could do that, but I didn't.

So what did I do? well the wee girl and I took a walk to the river, dipped our toes in and thought about it a bit.


Eventually we selected stones that we were happy with and then I had to think some more...

We, the stones on which you stand
Hold the waters and build the land.
In caves of darkest earth
Find we our crystal birth.
The sun with radiant light
Makes us sparkling bright...

(from the four elements by an anonymous writer) ...


they are all wrapped and posted, I do hope they like them.

Thursday, September 2, 2010

Wednesday Craft Group - Kangaroo Tutorial

Kangaroos this week... I made this big grey one who looks so huge next to the original (now safely on her way to the US).
I promised you all the pattern for this project ~ you can find it here, sorry it is a bit scribbly and there is no scale on it but i don't think it matters too much ~ remember tho the smaller you make it the more fiddly it is.

~Now how to put it together~

The Joey and the mother are made in basically the same way, start with the Joey because you will need to put it in the pouch and sew it in (to make sure it fits) before you finish the adult.

Start with your two front sections and sew (I blanket stitched) the centre seam from neck to tail - top to bottom.
(this is me sewing in the car while i wait for the big girl to finish her piano lesson)


Join in the first main body section starting at the base of the tail. Turn your front panel centre seam stitching to the inside (so you won't see the stitching, just a seam). sew up around the legs and arms toward the neck. When you reach the neck join in the second main body piece and sticth through all three layers and then sew back down toward the tail.
From the base of the tail, sew along the length and keep going up and round its back ~ remember to leave a decent opening for stuffing.
Come back to where you left off at the neck and sew up the face until you reach halfway round the nose; join in the head panel (point to the back, rounded end to the nose) sew one side then come back and sew around the other - stitch a little way down the back but leave your stuffing opening.
I stuffed some fleece into about the first inch of the tail section to give it a nice full shape then i filled the rest of the tail and the feet with riversand - poke it about a bit with a chopstick or some other long pointy thing to pack it in well. then check it stands...

(notice the change of outfit? now i am sitting in the car waiting for my big girl to finish zumba)
when you are happy stuff the legs really firmy with fleece and keep on stuffing not quite so firmly into the belly then really firmly again for the head and neck - don't sew your opening closed just yet.

Get your pouch section and Joey and try them on for size (day three...now in the bathroom supervising bath time). Happy with where it will all sit? start stiching the pouch on; stop about halfway, pop the Joey in and finish yor stitching with him sitting inside ~ this ensures that the Joey will fit nicely and you can get it in and out easily.

Adjust stuffing if you need to and then sew up your back section.

Add your ears and eyes and bouce off down the road! (finished! and just in time for craft too).

Said the kind Kangaroo, Oh what shall I do?
If I had a cradle I'd rock it,
But my baby is small, So I think afterall,
I'll carry her round in my pocket.

Wednesday, August 18, 2010

Wednesday Craft Group - Spring Peg Doll Tutorial

Today we made peg doll flowers ~


I wandered lonely as a cloud
That floats on high o'er vales and hills,
When all at once I saw a crowd,
a host, of golden daffodils;
Beside the lake, beneath the trees,
Fluttering and dancing in the breeze....
from The Daffodils by William Wordsworth

When I took over as craft group co-ordinator at the beginning of the year I also took temporary storage of about a bazillion of those clear plastic storage boxes full of 'stuff'. It has taken some time but I have poked around in each of the boxes and found the most amazing things. I am a bit frugal, don't like to waste, don't want to spend money on new stock when there was boxes of stuff to be made use of. Anyway in one of the boxes there were about 50 wooden pegs; I had no idea what to do with them and so I googled. I found that you can also get 'heads' and 'bases' for the pegs ~ now that opened up new possibilities.


Spring is just about sprug here in Brisbane, the weather is glorious ~ the last of the winter chill only appearing as the sun sets and only lingering til dawn...so I felt a bit springy and I made up these little patterns. I hope you enjoy them, easy peasy even for those with little fingers who may like to join in.


Peg Doll Flower ingredients for a Daffodil ~
(I apologise for the dodgy pictures, I was stitching at night and didn't realise how poor the light really was)


Download the pattern templates from here and cut out yor pieces. Glue your three peg pieces together and set them aside to dry. (I found that the 'head' beads don't go all the way on, no matter how hard you shove, so I just made the dress to fit her long neck)


Lay your collar piece over the skirt, matching the top edges as show above, and then stitch a small running/gathering stitch straight across ~ take note of the stitching line on the pattern template, it is about 1cm from the top edge. The pull up your stitching to gather


Wrap the gathered dress around the doll's neck and pull tight to make the gathers fit. Then stitch securely using whatever method comes to you. Using matching thread whip stitch, blanket or how ever else you fancy down the dress centre back seam to close it.


Play around with her hair, fiddling til you like the look and then carefully glue it on as a wig ~ set her aside to let it dry (I used curly fleece).

To make the daffodil make a row of small running stitches close to the straight edge and then pull to gather and secure the two ends together.


Take your little rectangle piece and roll up the long edge til it is small enough to fit neatly inside the centre of the petals and secure it with some small stitches. At one of the open ends cut a couple of slots so that it will open out and sit flat (see pic below) then poke the tube up into the petal piece with the flaps you just cut staying underneath on the wrong side.


Stitch the flaps to the underside of the petals section to hold the two pieces together.


Flip it over, make loads of little cuts in the top of the trumpet ~ flower done! (I think these would look good on hair clips too...now there is an idea!)


Glue the flower hat to your doll and you are finished ~

I have plans for this little Daffodil flower child to travel to South Africa to my blogging friend Linda's home. Linda designed and then shared a tutorial for a stunning knitted Daffodil last week on her blog Natural Suburbia ~ anyway I thought one good deed deserves another. If you would like her Linda, she is yours!

Wednesday, August 4, 2010

Wednesday Craft Group - Wood and Wire Dolls

Well first I painted dozens and dozens of little feet ~ i love these little wood and wire dolls because the possibilities are absolutely endless ~


 and then i turned them into Wizards ~
and flower fairies ~


A Fairie Rhyme 
1800's author unknown

Monday's the fairies' washing-day
The early morning hours find them all working hard away
Their wash-tubs are the flowers
The cup-like ones are best, they say
Those catch the dew, you know,
And fairies dresses washed that way
Are white as driven snow.

Tuesday's the fairies' drying-day
So Tuesdays should be fine
and rather windy, by the way,
and then the Sun should shine.
And rose-bushes should hide each thorn that day
~I'll tell you why~
It's lest the drsses should be torn
When they're hung out to dry.

Then Wednesday is ironing-day,
the Sundbeans for a joke
Come down to help. That's work, they say,
too hard for fairy folk.
They press out all the creases,
and in quite a little while
those dresses look as grand as grand,
and How the fairies smile!

Thursday's the fairies' darning-day,
Then, seated in a row
Upon an apple-blossom spray,
The fairies sit and sew,
They darn with silk each scrap of stuff
that by mistake they tore.
And, if their silk's not quite enough,
The spiders bring them more!

Wednesday, July 28, 2010

Wednesday Craft Group - knitted cats

We did a couple of small projects today; for the knitters or those keen to start ~ Cat and Kittens
"...when she is angry she growls,
when she is lonely she howls.
When breakfast is nearly hers,
she paces about and purrs..."
from the poem A Kitten's World by Lea Wills aged 11

These cats were made with one of the numerous animal knitting patterns from the book Toymaking with Children by Freya Jaffke.

and for those who say they can't knit (or didn't feel like it) Lavender hearts - stuffed with fresh flowers - oh the smell was divine...and come to think of it those gathered around that table were very calm.

Wednesday, July 14, 2010

Wednesday Craft Group - Fleece Birds

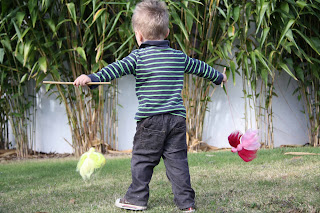
Today we made these beautiful fleece birds - my nephew took them for a fly around the neighbour's garden when we got home...he liked the yellow one best.

Once a little bird went hop, hop, hop,
And I said, "little bird, will you stop, stop, stop."
I ran to the window to say "how do you do?"
But she shook her little tail and away she flew.

Want to make one? here I'll show you how - tis child's play


You will need a thin length of wool roving no longer than from your inside wrist to your inside elbow, a thicker piece about a third to half that length, a bit of crochet type cotton, a scrap diamond shaped bit of felt, a stick of some kind and a sharp needle.

Take the long bit of fleece and tie a knot in the centre, don't pull too tight - that is your bird's head.

pull out a super skinny bit of fleece from under the knot and wrap it around under the head to form a neck
open up the two halves and put the short segment between to make your wings (my big girl wanted to add colour so she fluffed out a bit of yellow too)

then pull out another skinny bit and wrap it behind the wings in the same way you did the neck; this will form your body segment.


Thread your needle and knot the end of your cotton. Put your needle in under the neck segment pulling gently to bury the knot and come out in the head segment where you want the beak to be. Poke your needle through the centre of your piece of felt and back in again and pull the beak close to the head


put the needle back into the head where you came out and come out again around the centre back - this will be the balancing point - tie it to a stick and you are done.


see child's play!